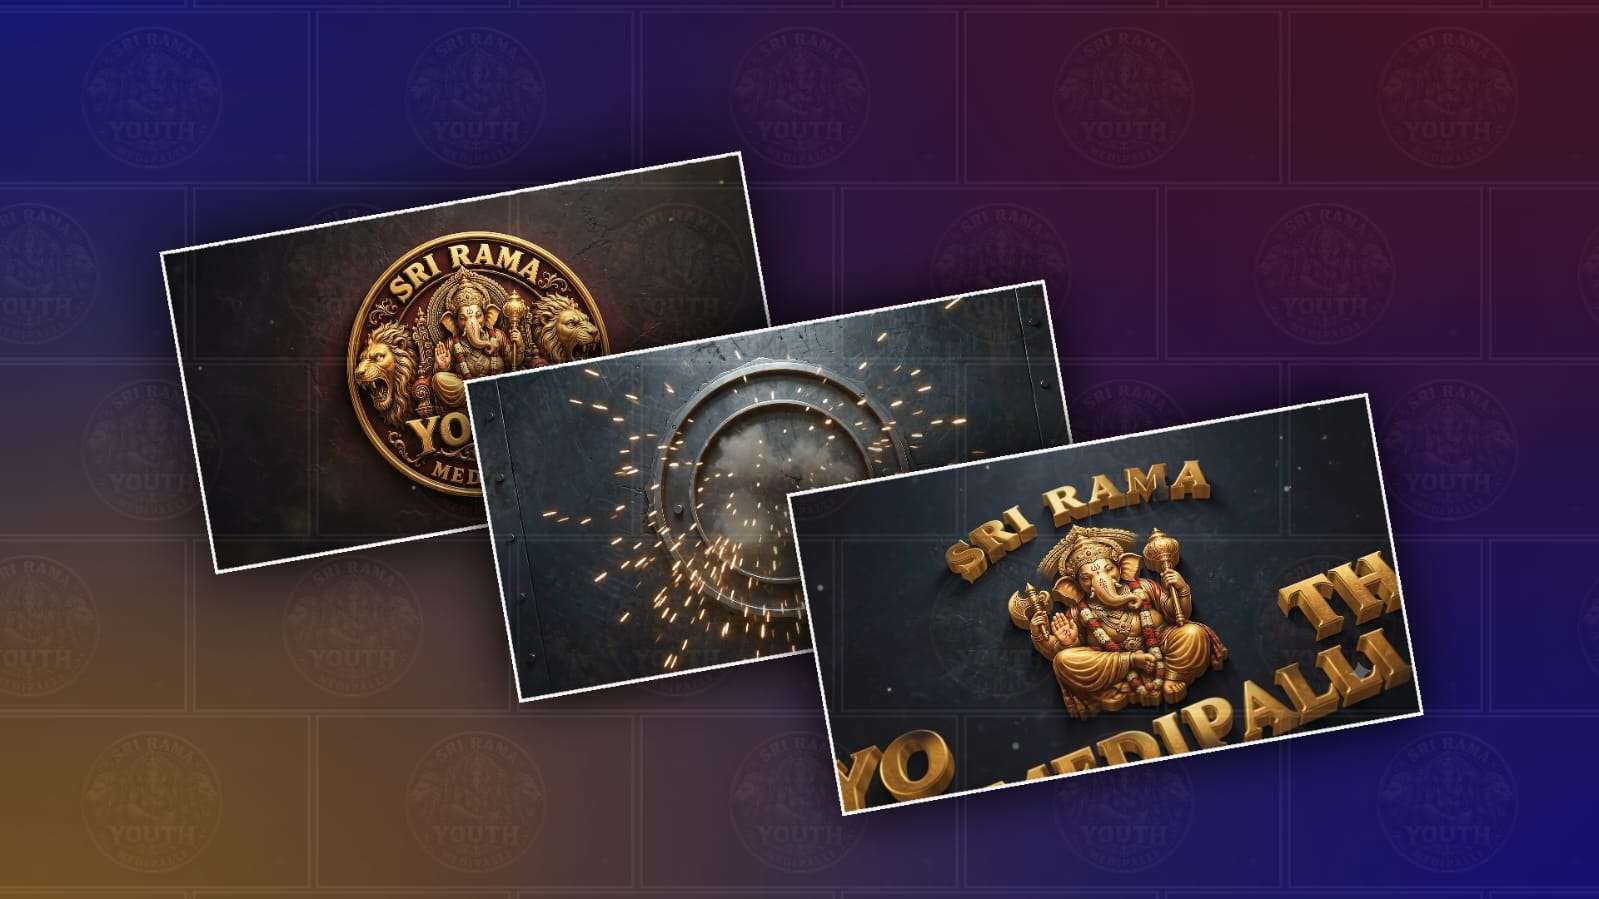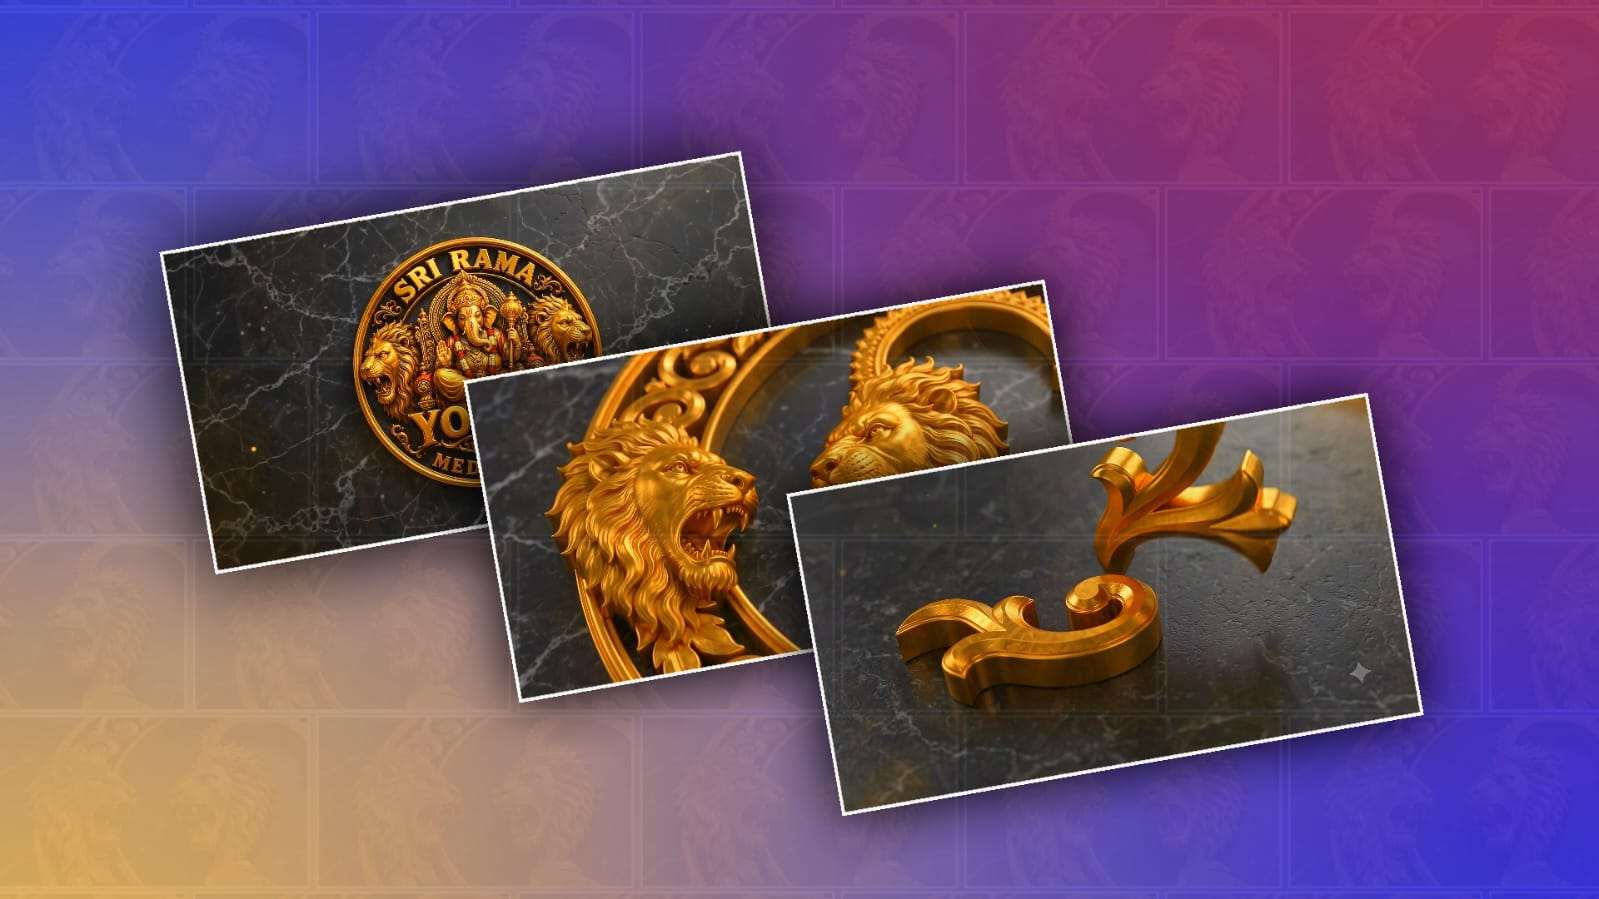
Creating a 3D youth logo animation can make a simple brand mark look much more exciting, modern, and professional. The idea is to show the logo as if it is being physically assembled piece by piece, with realistic materials, movement, lighting, shadows, and a final cinematic reveal. With Google Gemini and its image and video generation capabilities, you can create this type of concept without needing advanced 3D animation software. Gemini can generate or edit images, while its Veo video capabilities can turn visual ideas and reference images into short animated clips. Google has also continued improving image-to-video and reference-image workflows, making this approach more practical for creative projects.
The first thing you need is a clear idea of what your youth logo should look like. Before opening Gemini, think about the logo’s colours, shape, typography, materials, and personality. A youth-focused logo usually works well with energetic colours, bold geometry, clean typography, and a modern 3D appearance. For example, imagine a logo made from glossy blue and orange pieces, with a strong geometric symbol and a bold wordmark. Instead of asking Gemini to immediately create a video, it is better to develop the main logo image first. This gives you a visual reference that can later be animated.
Open Google Gemini and describe the logo you want in detail. Your prompt should explain the subject, composition, materials, lighting, camera angle, and overall style. Google recommends using specific descriptions covering elements such as the subject, composition, action, location, and style when generating or editing images. You could write something like: “Create a premium 3D youth brand logo, bold geometric emblem with modern typography, glossy blue and orange metallic materials, clean futuristic design, centred composition, realistic studio lighting, soft reflections, dark neutral background, high-end commercial branding style, front-facing camera, sharp details.”
Once Gemini creates the first version, do not worry if it is not perfect. One of the advantages of conversational image editing is that you can keep refining the same concept. You can ask Gemini to make the logo more youthful, simplify the background, increase the metallic texture, change the colours, improve the lettering, or make the emblem more symmetrical. Gemini supports conversational image editing, including changing objects, backgrounds, styles, and other parts of an image.
For a physical assembly animation, the most important part is the illusion that the logo is actually made from separate physical components. You want the viewer to feel that individual pieces are arriving, rotating, sliding, snapping together, and eventually becoming one complete logo. This is different from simply asking for a logo that spins in 3D. The prompt needs to describe physical construction.
For example, you can ask Gemini to create a scene where the logo is separated into several realistic components. One piece could be a metallic letter, another could be a colored geometric shape, and another could be a small connecting element. Place these pieces on a clean studio surface with realistic shadows. The components should have enough space between them so that their individual forms are easy to recognise.
After creating the reference image, move to the video generation feature available in your Gemini experience. Google has offered Veo-powered video generation in Gemini, including photo-to-video workflows where an uploaded image can be transformed into a short video by describing the desired movement and sound. Current Veo capabilities have also expanded to support reference-image workflows, vertical video, and higher-resolution outputs in supported products and plans. Availability and limits can vary by account, country, and subscription.
Upload the prepared 3D logo image and describe the animation rather than simply saying “animate this logo.” A stronger prompt would be: “Turn this 3D logo into a cinematic physical assembly animation. The individual logo pieces are separated on a dark studio floor. First, the small metallic components move forward smoothly. The blue geometric pieces rotate in the air and settle into their correct positions. The orange pieces slide in from different directions and lock together with realistic mechanical precision. The final emblem becomes completely assembled. The camera slowly pushes forward while maintaining focus on the logo. Use realistic physics, reflections, contact shadows, subtle motion blur, premium advertising lighting, and a clean professional background. End with the completed logo centred on screen.”
The word “physical” is especially useful because you want the animation to look like real objects rather than flat graphics. You can also describe the material behaviour. For example, metallic pieces should reflect studio lights, plastic parts should have subtle surface reflections, and heavier components should move with believable weight. Adding words such as “realistic physics,” “contact shadows,” “surface reflections,” “mechanical movement,” and “precise alignment” can help communicate the visual goal.
It is also useful to control the camera. A professional logo animation normally looks better when the camera movement is simple. Instead of asking for dramatic camera movement, request a slow push-in, gentle orbit, or controlled dolly movement. This keeps attention on the logo assembly. You can begin with a wider shot showing all the individual pieces and finish with a close-up of the completed logo.
Sound can make the animation feel even more physical. Depending on the Veo version and access available to you, you can describe sound effects such as soft mechanical clicks, metallic impacts, subtle whooshes, and a short cinematic sound at the final reveal. Google has described Veo 3 as supporting generated sound, including speech, music, and sound effects. A prompt could say, “Add subtle mechanical clicks as each piece connects, gentle whooshes during movement, and a powerful but clean impact sound when the final logo locks into place.”
For the final few seconds, keep the completed logo still. This is important because viewers need time to recognise the brand. Ask Gemini to hold the final composition for a moment with the logo centred, sharp, and well lit. A small amount of camera movement can continue, but avoid unnecessary effects that distract from the brand identity.
If the first video does not look correct, do not completely change the concept. Instead, refine one problem at a time. If the pieces move too randomly, emphasise “controlled mechanical assembly.” If the logo changes shape, tell Gemini to preserve the exact reference design. If the camera moves too quickly, request a slower camera. If the final logo becomes distorted, use a stronger reference image and explicitly say that the final assembled logo must match the original design.
You can also create several short versions and choose the strongest result. AI video generation is not always predictable, so a successful workflow usually involves experimentation. Google itself notes that video prompting can take practice and that results may sometimes require another attempt.
For social media, consider the final aspect ratio before generating the animation. A horizontal 16:9 version is suitable for YouTube and presentations, while Horizontal 16:9 is more useful for Shorts, Reels, and other mobile-first platforms. Google has introduced native vertical video capabilities in its newer Veo workflows, which can make portrait-oriented content more practical.
Finally, remember that AI-generated logo animation is best treated as a creative production tool rather than a replacement for brand design. If the logo is for a real company, make sure the final typography, colours, proportions, and trademark elements are accurate. AI-generated text and logos can sometimes contain small errors, so a final cleanup in a conventional graphics or video editor may still be worthwhile.
The biggest secret is to think like a director instead of simply asking Gemini to “make a cool logo video.” First design a strong 3D logo, then create a believable physical arrangement of its components, and finally describe how those components should move, connect, and reveal the finished identity. With a good reference image and a detailed animation prompt, Google Gemini and Veo can turn a simple youth logo concept into a short, polished physical assembly animation that feels much closer to a professional brand commercial.
LOGO PROMPTS CLICK HERE
BGM DOWNLOAD
SCENE 1
Use the uploaded logo image as the EXACT and ONLY logo design reference. Create a highly realistic, premium cinematic 3D logo formation animation.

IMPORTANT:
Do NOT create a generic particle assembly. Do NOT show the complete logo at the beginning. Do NOT make the entire logo appear suddenly. The logo must be physically formed piece by piece.

START:

Begin with an extreme macro close-up of a dark, premium black stone / metallic surface. The camera is very close to the surface. Only a small portion of the future emblem area is visible. Individual SOLID GOLD 3D components begin entering the scene one at a time from outside the frame. These are not flat images and not glowing particles. Each component must be a real, thick, heavy, beautifully engraved 3D gold-metal object with realistic bevels, grooves, reflections and depth. First, several small ornamental curved gold pieces fly into the frame from different directions. Each piece naturally rotates in 3D while moving through the air. The camera follows the moving pieces with cinematic macro camera movement and realistic motion blur. One piece reaches the dark surface and physically settles into its exact position. Then another piece arrives from a different direction, rotates, aligns precisely and locks into position beside it. Then another piece arrives. Continue this process with individual ornamental gold components, decorative curves and parts of the outer circular frame. Every piece must have realistic weight, inertia, gravity, contact shadow and metallic reflection when it touches the surface. Show extremely detailed close-ups of the engraved gold surfaces. Use shallow depth of field and cinematic focus pulling:
focus on the approaching gold piece → then shift focus to the piece already placed on the emblem. Use dramatic soft golden highlights, realistic reflections, subtle dust and very small golden particles only in the atmosphere. The animation should feel like a real luxury handcrafted 3D metallic emblem is being physically constructed by invisible precision mechanisms. At the end of exactly 10 seconds, only the FIRST PORTION of the logo should be constructed. The complete Ganesha, lions and text must NOT be visible yet. The camera should remain close to the partially formed emblem.

END FRAME:
A clearly visible partially assembled golden section on the dark surface, with a few individual gold pieces still floating nearby, ready for the next stage.

NO sudden cut. NO morphing. NO instant transformation. NO complete logo reveal. NO random symbols. NO extra text. NO redesign of the uploaded logo. The uploaded logo is the exact final design target; only its individual 3D components are being physically revealed and positioned.

Duration: EXACTLY 10 seconds.
Aspect ratio: 16:9. Ultra-realistic 3D. Premium cinematic macro cinematography. Realistic gold metal. Realistic depth and shadows. High-end Hollywood-style product-film quality.
SCENE 2
Use the Uploaded first photo as first frame Also use the secong original uploaded SRI RAMA YOUTH MEDIPALLI logo as the EXACT final design reference. Continue the animation directly from the first frame.

IMPORTANT:
Do NOT restart the animation. Do NOT change the camera position suddenly. Do NOT create a new logo. Do NOT show the complete logo instantly. Continue the same realistic physical 3D construction process from Scene 1.

The partially constructed golden emblem from Scene 1 is already present on the dark premium surface. Continue with individual SOLID GOLD 3D components arriving one by one. Each component must physically travel through the air, rotate naturally in 3D, approach its exact location, touch the existing structure and lock into position. Show different components entering from different directions and different depths. The camera moves smoothly around the partially constructed emblem in extreme macro close-up. Now progressively construct the more detailed central and side portions of the logo. First, continue completing the intricate golden outer ornaments and curved decorative elements. Then begin revealing the two golden lion elements from the original logo. Do NOT make the lions appear suddenly as complete images.

Their detailed 3D ornamental components should arrive individually:
mane details, face structure, ears, eyes, mouth details, and surrounding golden decorative elements. Each component must look like a real solid sculpted gold-metal piece with thickness, bevels, engraved details and realistic reflections. Then begin constructing the central Ganesha area. Do NOT make Ganesha appear instantly.

Individual sculpted 3D golden components should physically arrive and lock into position:
the decorative circular halo, ornamental throne structure, crown, head, ears, trunk, arms, jewelry and surrounding details. Keep the movement slow enough to clearly see every individual piece, but cinematic and powerful. Use realistic gravity, inertia, contact shadows, metallic reflections and subtle vibration when each piece locks into place.

Use extreme macro cinematography: very shallow depth of field, cinematic focus pulls, realistic motion blur, slow camera movement, dramatic golden highlights,
dark premium background. The camera should occasionally pass extremely close to the gold surface, revealing the engraved texture and realistic 3D depth. By the end of the 10 seconds, the outer frame, lions and most of the central Ganesha structure should be substantially constructed.

IMPORTANT:
Do NOT reveal the complete SRI RAMA / YOUTH / MEDIPALLI text yet. End with the logo still partially incomplete, ready for the final text and finishing elements in Scene 3. The final frame must be visually stable and usable as the FIRST FRAME of Scene 3.

NO sudden cut. NO morphing. NO particle-to-logo effect. NO flat 2D elements. NO instant appearance. NO random text. NO additional objects.

Duration: EXACTLY 10 seconds.
Aspect ratio: 16:9. Ultra-realistic cinematic 3D. Realistic gold metal physics. Premium Hollywood-level macro cinematography.
SCENE 3
Use the Uploaded first image as the EXACT FIRST FRAME of this scene. Also use the second original uploaded SRI RAMA YOUTH MEDIPALLI logo as the EXACT final design reference. Continue the animation seamlessly from Scene 2.

IMPORTANT:
Do NOT restart the animation. Do NOT change the existing logo structure. Do NOT generate a different logo. Do NOT make the final logo appear instantly. The partially completed golden emblem is already visible. Begin with an extreme macro close-up of the remaining unfinished areas. The final individual gold-metal components now arrive one by one. Each component must be a real, solid, thick 3D metallic object. They physically fly into the frame, rotate naturally, align precisely and lock into their exact position. First complete the remaining outer decorative details. Then complete the two detailed golden lion elements. Then complete the final central Lord Ganesha ornaments and surrounding decorative elements.

Now begin the FINAL TEXT REVEAL.

The words must appear as REAL THICK RAISED GOLD 3D LETTERS, physically moving into position — NOT flat text and NOT a fade-in. Reveal the exact words from the uploaded logo:

SRI RAMA

YOUTH

MEDIPALLI

Each letter should independently move into the correct position, rotate slightly in 3D and physically settle into the emblem.

The spelling must be EXACT.

Do NOT generate any other words. Do NOT change the typography arrangement. Do NOT add extra text. After the final letter of MEDIPALLI locks into place, create a powerful but realistic metallic impact. A bright golden light sweep travels across the entire completed logo. The camera then slowly pulls backward from the macro close-up into a wider cinematic hero shot. As the camera pulls back, the entire SRI RAMA YOUTH MEDIPALLI emblem becomes clearly visible. Show realistic polished gold reflections, deep engraved details, bevels, contact shadows and subtle atmospheric golden particles. The background remains dark, premium and cinematic. The final 2–3 seconds must be a steady hero shot of the COMPLETE logo. The final logo must match the uploaded reference design in overall composition, symbols, proportions and text.

NO morphing. NO instant appearance. NO generic particle assembly. NO flat 2D logo. NO random objects. NO extra text. NO sudden cuts. The entire scene must feel like a real luxury handcrafted 3D metallic emblem has just been physically completed.

Duration: EXACTLY 10 seconds.
Aspect ratio: 16:9. Ultra-realistic 3D. Premium Hollywood-level cinematic product-film quality. Realistic gold metal physics. Macro cinematography. Dramatic lighting.