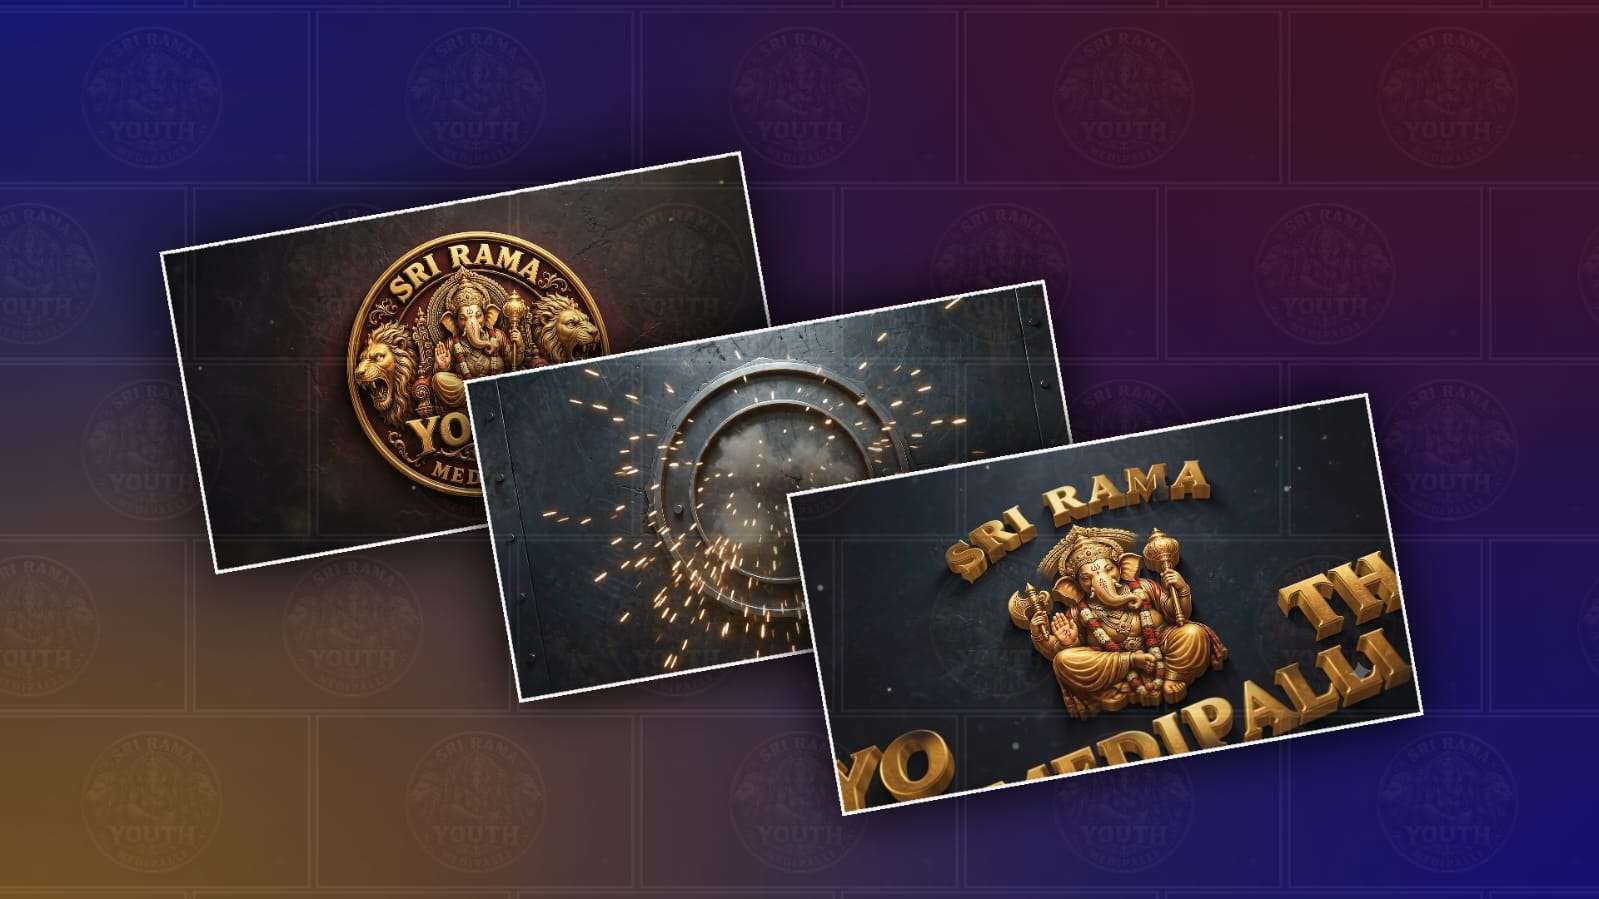
Creating a 3D logo assembly animation can make a brand identity feel much more modern, polished, and memorable. Instead of showing a logo as a simple flat image, a 3D assembly animation can reveal how different pieces come together, creating a cinematic effect that works well for YouTube videos, social media, websites, presentations, and advertisements. The good news is that Google Gemini can help you create the concept, prompts, visual elements, animation instructions, and even refine the overall creative direction without requiring advanced 3D animation skills.
The first thing you need is a clear idea of how you want the logo to appear. Think about the final shape of your logo, its colours, materials, background, lighting, and the way the individual pieces should assemble. For example, you might want a metallic logo where separate letters fly in from different directions and lock together in the centre. Another option is to have small geometric parts rotate and move into position before forming the complete logo. Having this idea in mind makes it much easier to get useful results from Gemini.
Start by preparing your logo. If you already have a high-quality logo file, preferably a PNG with a transparent background or an SVG, keep it ready. A clean logo is important because small imperfections can become more noticeable when you turn the design into a 3D-style animation. If you do not have a logo yet, you can also use Gemini to brainstorm a logo concept, but for an actual brand project, it is better to work from an approved logo rather than asking an AI system to recreate an existing brand mark from memory.
Open Google Gemini and describe the animation you want in natural language. You do not need to use complicated technical terms. Explain what the logo looks like, what material it should have, how the pieces should move, and what kind of atmosphere you want. For example, you could describe a premium silver 3D logo with separate pieces floating in a dark studio environment, slowly rotating before moving toward the centre and assembling into the finished logo. Ask Gemini to make the movement smooth, cinematic, realistic, and professional.
The quality of your instructions makes a big difference. Instead of simply saying “make a 3D logo animation,” give Gemini more visual information. Mention the camera position, lighting, depth, reflections, shadows, motion direction, background, and final presentation. You can also specify the animation length if the tool or workflow you are using supports it. A detailed description gives the AI a much better understanding of the visual result you are trying to achieve.
A useful approach is to divide the animation into stages. The first stage can show the individual logo components appearing separately. The second stage can show them rotating or moving toward their final positions. The third stage is the actual assembly, where the parts connect smoothly. The final stage can hold the completed logo for a few seconds while the camera makes a subtle movement. This structure gives the animation a beginning, middle, and ending instead of making it look like objects simply appear on the screen.
You can ask Gemini to help you write a production-ready prompt for each stage. For example, ask it to create one prompt for the opening shot, another for the assembly sequence, and another for the final logo reveal. This can be more effective than asking for the entire animation in one vague instruction because you have greater control over each part of the sequence. You can then compare the results and adjust the prompts until the visual style remains consistent.
Lighting is especially important in a 3D logo animation. A dark background combined with soft studio lighting can make metallic or glossy materials look impressive. You can ask Gemini for realistic reflections along the edges of the logo, subtle shadows underneath floating pieces, and a gentle glow during the final assembly. If you want a more corporate appearance, choose clean lighting and restrained effects. If you want something dramatic, you can introduce stronger highlights, particles, atmospheric fog, or a brighter final flash.
Camera movement also makes a big difference. A completely static camera can make even a good animation feel ordinary. Consider asking for a slow camera push-in as the pieces assemble, followed by a small rotation around the finished logo. Another option is to begin with a close-up of individual components and gradually pull back to reveal the complete logo. The camera movement should remain smooth rather than excessively fast, especially if the goal is a premium brand presentation.
Once you have generated or planned the visual sequence, pay attention to consistency. AI-generated visuals can sometimes change the shape, proportions, colours, or details of a logo between different frames or generations. This is one of the biggest challenges when creating branded animation with generative AI. To reduce the problem, keep your instructions consistent and provide the original logo as a reference whenever the available Gemini workflow supports image input. Clearly state that the logo design, proportions, typography, and colours should remain unchanged.
If your first result does not look right, do not start over immediately. Instead, tell Gemini exactly what needs to change. You could say that the logo should remain identical to the reference, the pieces should move more slowly, the reflections should be reduced, or the camera should be centred. Specific feedback is much more useful than simply saying that the result is not good. Treat Gemini like a creative assistant and refine the animation through several iterations.
Sound can also make the final animation feel much more professional. After creating the visual sequence, consider adding subtle sound effects such as mechanical clicks, metallic movements, soft whooshes, or a short impact when the final logo locks into place. A restrained background music track can also help. The sound should support the assembly rather than overpowering it. For a premium logo reveal, even a few carefully timed effects can make the animation feel significantly more polished.
Before publishing the animation, check the final logo carefully. Make sure the spelling, colours, proportions, and brand details are correct. Watch the complete animation several times to see whether the movement feels natural. If the assembly happens too quickly, slow it down. If the ending feels abrupt, add a short pause after the logo is fully assembled. You can also experiment with different backgrounds and lighting styles to find the version that best matches your brand.
The main advantage of using Gemini for this type of project is that you can develop the creative direction through conversation. You do not necessarily need to know traditional 3D software terminology before starting. You can explain your idea in ordinary language and ask Gemini to turn it into a more detailed production prompt. You can also use it to brainstorm different assembly styles, camera movements, materials, lighting setups, and transition ideas.
However, it is important to remember that Gemini is most useful as part of the creative workflow rather than as a replacement for every professional animation tool. Depending on the exact Gemini features available to you, you may still need a dedicated video editor or 3D application for precise timing, compositing, sound design, colour correction, and final export. Gemini can help you develop the visual concept and generate or guide AI-assisted content, while traditional editing tools can give you the detailed control needed for a finished commercial project.
A strong 3D logo assembly animation does not need hundreds of effects. The most effective versions usually have a simple concept, consistent branding, smooth movement, attractive lighting, and a satisfying final reveal. Start with the logo itself, decide how its components should assemble, describe the visual style clearly to Gemini, generate the sequence, review the result, and refine it through multiple iterations. With a little experimentation, you can turn a basic flat logo into a modern 3D reveal that looks far more engaging and professional.
LOGO PROMPTS CLICK HERE
VIDEO PROMPT STYLE 1
Create a 10-second ultra-realistic cinematic 3D logo reveal using the uploaded logo as the EXACT reference. The entire logo must be constructed from separate heavy metallic 3D elements. Preserve the exact original logo design, Lord Ganesha, Youth Name, Village Name, typography, spelling, proportions and layout.

SCENE:

Start with a dark cinematic environment featuring a large premium dark-metal wall. One by one, every individual element from the uploaded logo transforms into a solid, heavy 3D metallic piece and shoots toward the wall at extremely high speed. Each piece travels like a precision metal projectile and SLAMS into its exact position on the wall.

At every impact:

- Strong metallic collision
- Sharp cinematic “SHING!” / “CLANG!” sound
- Tiny sparks and realistic metal particles
- Subtle impact vibration
- Small dust burst from the wall
- Realistic metallic reflections

The elements must arrive FAST and precisely, one after another, creating an energetic rhythmic assembly. The Lord Ganesha element, Youth Name, Village Name and every other logo component must hit the wall separately and lock perfectly into its original position.

Do NOT randomly scatter the parts. Do NOT change the logo design. Do NOT change any letters or spelling. Do NOT create extra text. Do NOT distort Lord Ganesha. Do NOT use sudden scene cuts.

FINAL 2 SECONDS:
The final metallic piece slams into position with a powerful cinematic impact. The entire original logo is now completely assembled on the wall. Camera rapidly pulls back, revealing the full logo centered and perfectly visible. A dramatic light sweep travels across the metallic surface, revealing realistic 3D depth, reflections and engraved details.

STYLE:
Hollywood-level cinematic 3D logo reveal, ultra-realistic heavy metal, high-speed motion, precision assembly, dramatic lighting, realistic sparks, metal particles, impact vibration, deep shadows, premium promotional animation, sharp 4K quality.

AUDIO:
Fast cinematic metallic impacts synchronized precisely with every incoming logo element. Use sharp “SHING!”, heavy “CLANG!” and deep metal impact sounds, followed by a powerful cinematic final impact. No dialogue, no voiceover, no music overpowering the impact sounds. The final frame must display the COMPLETE ORIGINAL LOGO clearly, sharply and unobstructed.
VIDEO PROMPT STYLE 2
Create a 10-second ultra-realistic cinematic 3D logo reveal animation using the uploaded logo as the EXACT reference. Preserve the original logo design, Lord Ganesha, Youth Association name, Village name, typography, spelling, proportions, layout and all visual elements exactly. Do not redesign, replace, distort or add anything.

ANIMATION:

0–2 seconds:
Start with a dark cinematic background. Individual elements from the uploaded logo appear separately in 3D. Begin with the Lord Ganesha element, followed by the Youth Name and Village Name. Each element slowly zooms toward the camera with realistic 3D depth, subtle rotation and premium lighting.

2–6 seconds:
All separated 3D elements smoothly move toward their EXACT original positions in the logo. The Lord Ganesha, text and other elements assemble precisely according to the uploaded reference. Use controlled cinematic motion, realistic depth, metallic reflections and soft light streaks. No random movement.

6–8 seconds:
The complete logo finishes assembling perfectly. The camera slowly pulls back to reveal the ENTIRE logo clearly and completely.

8–10 seconds:
Hold the fully assembled logo in the center. Add a subtle cinematic push-in and a premium light sweep across the 3D logo. Keep every letter and every detail sharp, readable and unchanged.

STYLE:
Premium Hollywood-level 3D logo reveal, ultra-realistic materials, realistic depth and extrusion, cinematic lighting, dramatic shadows, elegant reflections, smooth motion, high-end promotional animation, sharp 4K quality.

IMPORTANT:
Use ONLY the uploaded logo as the design reference. Do NOT change the logo text or spelling. Do NOT change the Lord Ganesha design. Do NOT create extra letters, symbols or characters. Do NOT deform the typography. Do NOT crop the logo. Do NOT use sudden cuts. Keep the entire animation continuous and smooth. The final 2–3 seconds MUST show the complete original logo fully assembled, centered and clearly visible.